Make.com Integration
Step-by-Step Instructions
Step 1: Log in to your Make.com account.
Step 2: Click this link to add ChatMaven to Make:
👉 Install ChatMaven App "https://us2.make.com/app/invite/8f578f00a36ff8231fbe70bea659f3a1"
Step 3: Click Install.
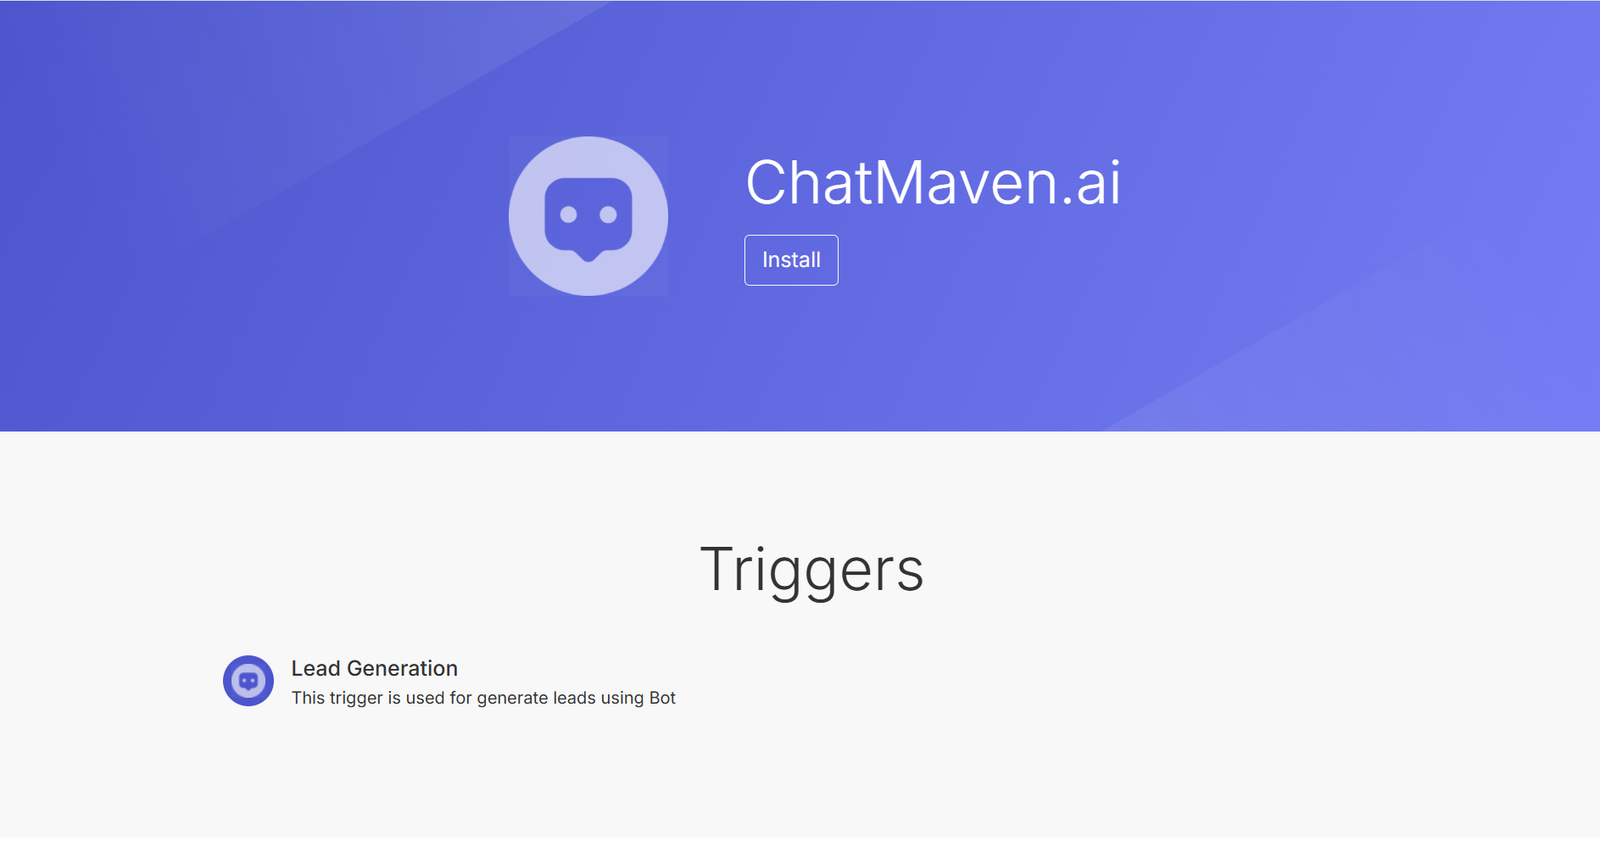
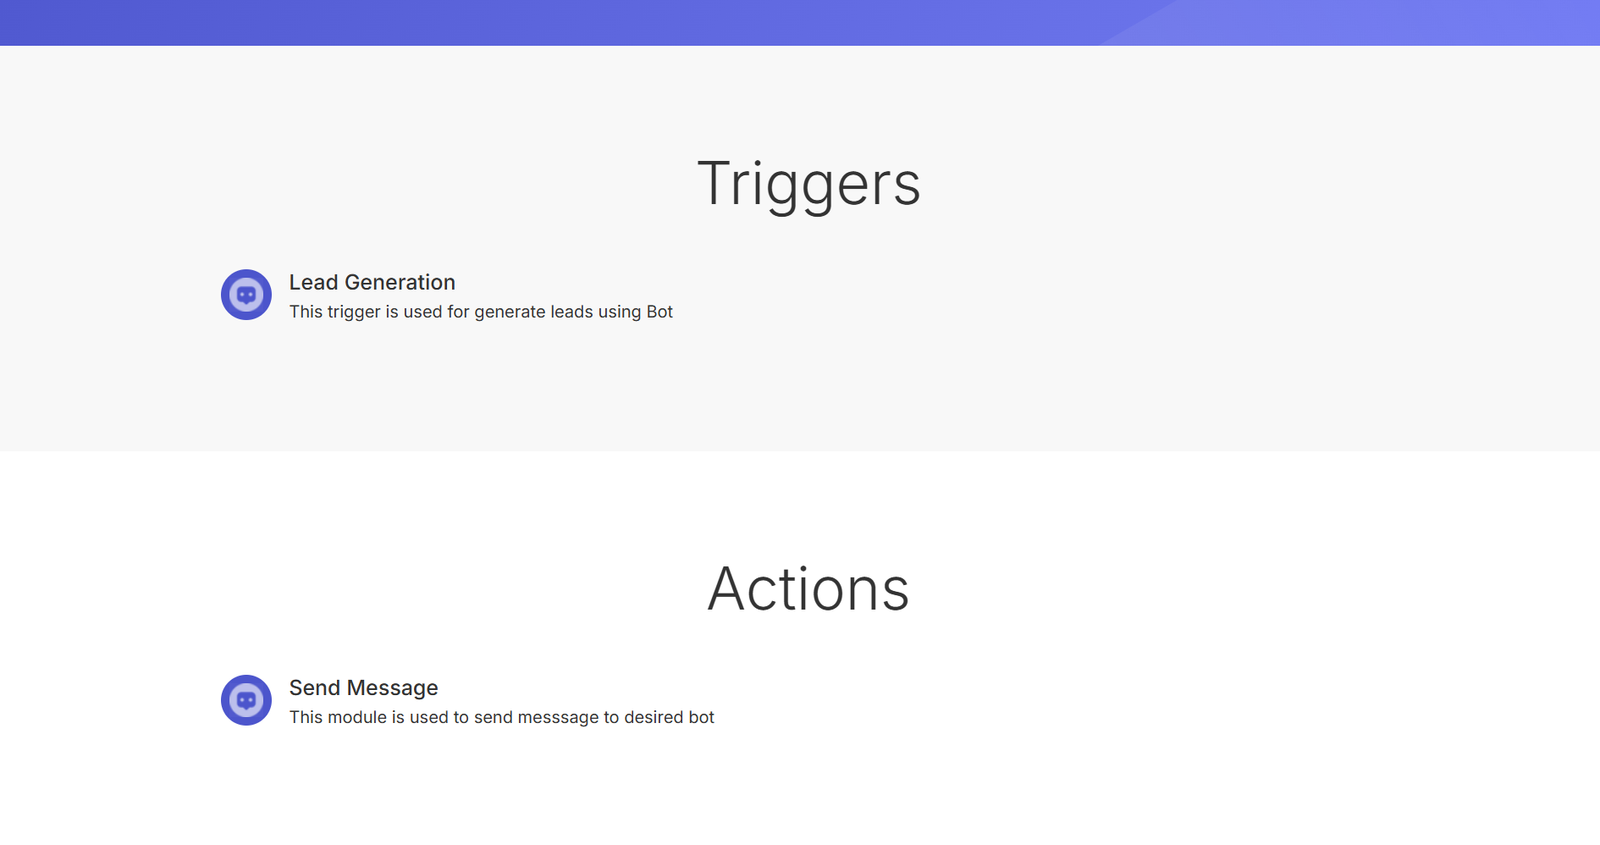
Step 4: You can use the integration in two ways:
- Trigger – Send leads from ChatMaven to another platform.
- Action – Send a message to ChatMaven and let the bot forward the info to another platform.
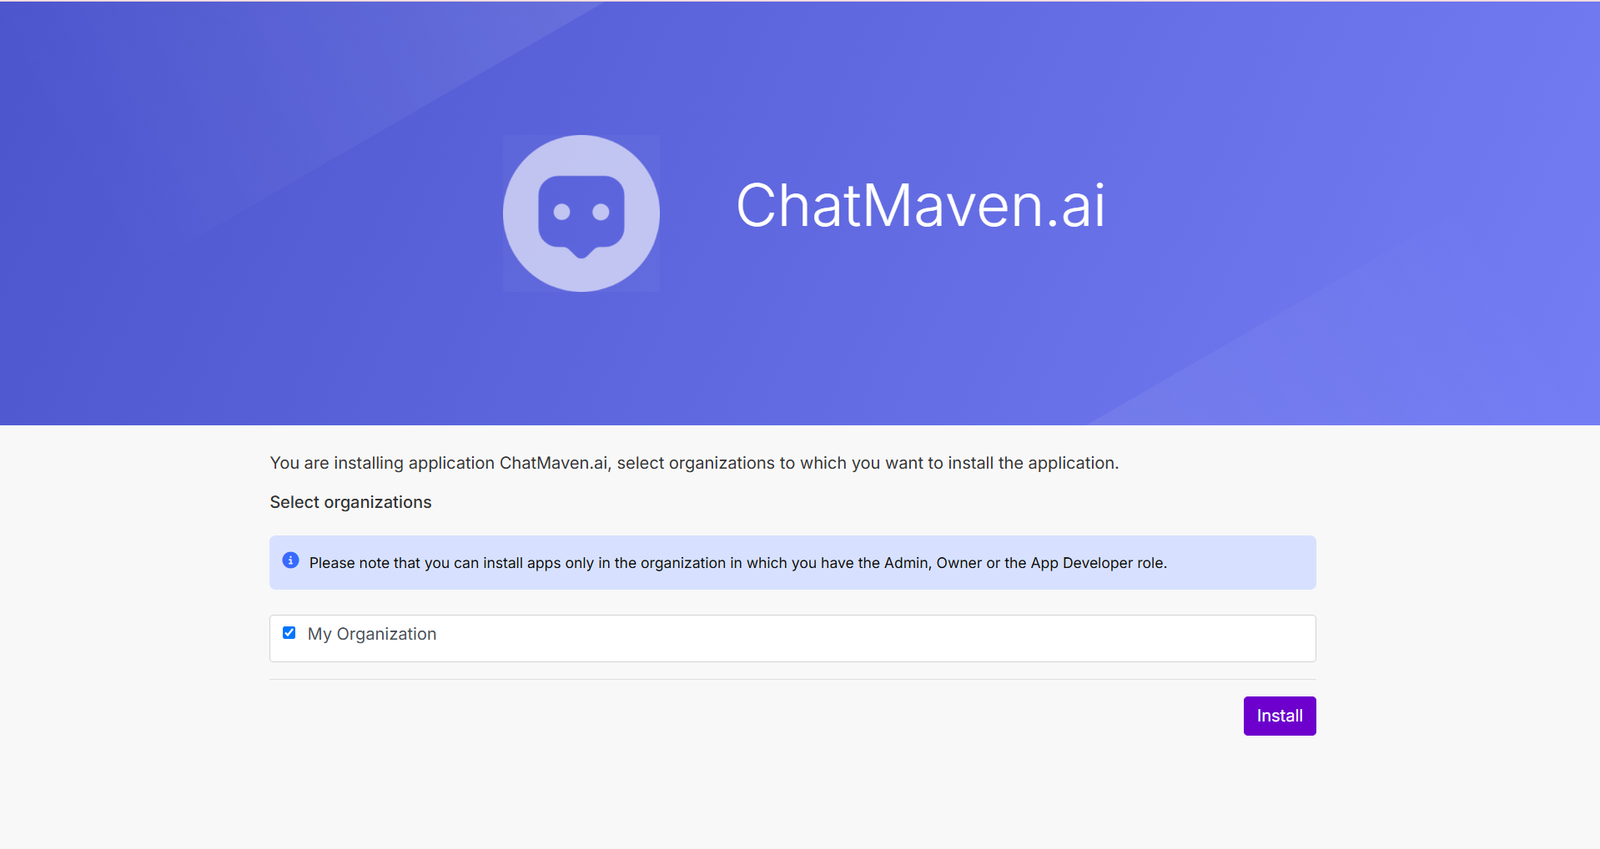
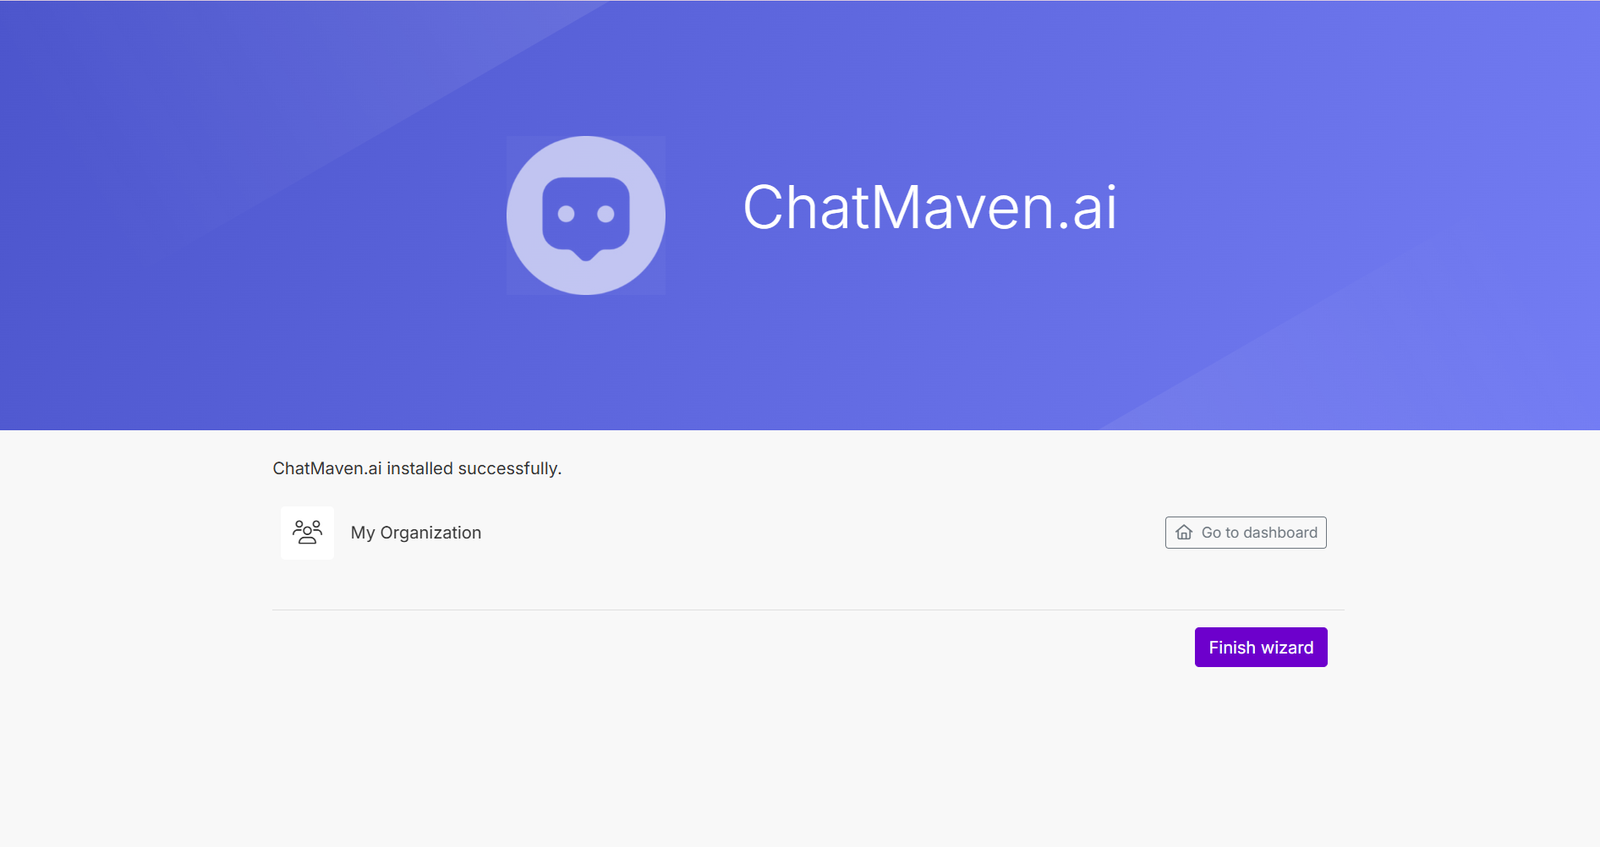
Step 5: After clicking "Install," choose My Organization and then click Install again.
Step 6: Click Finish Wizard to complete the setup.
Create an Automation
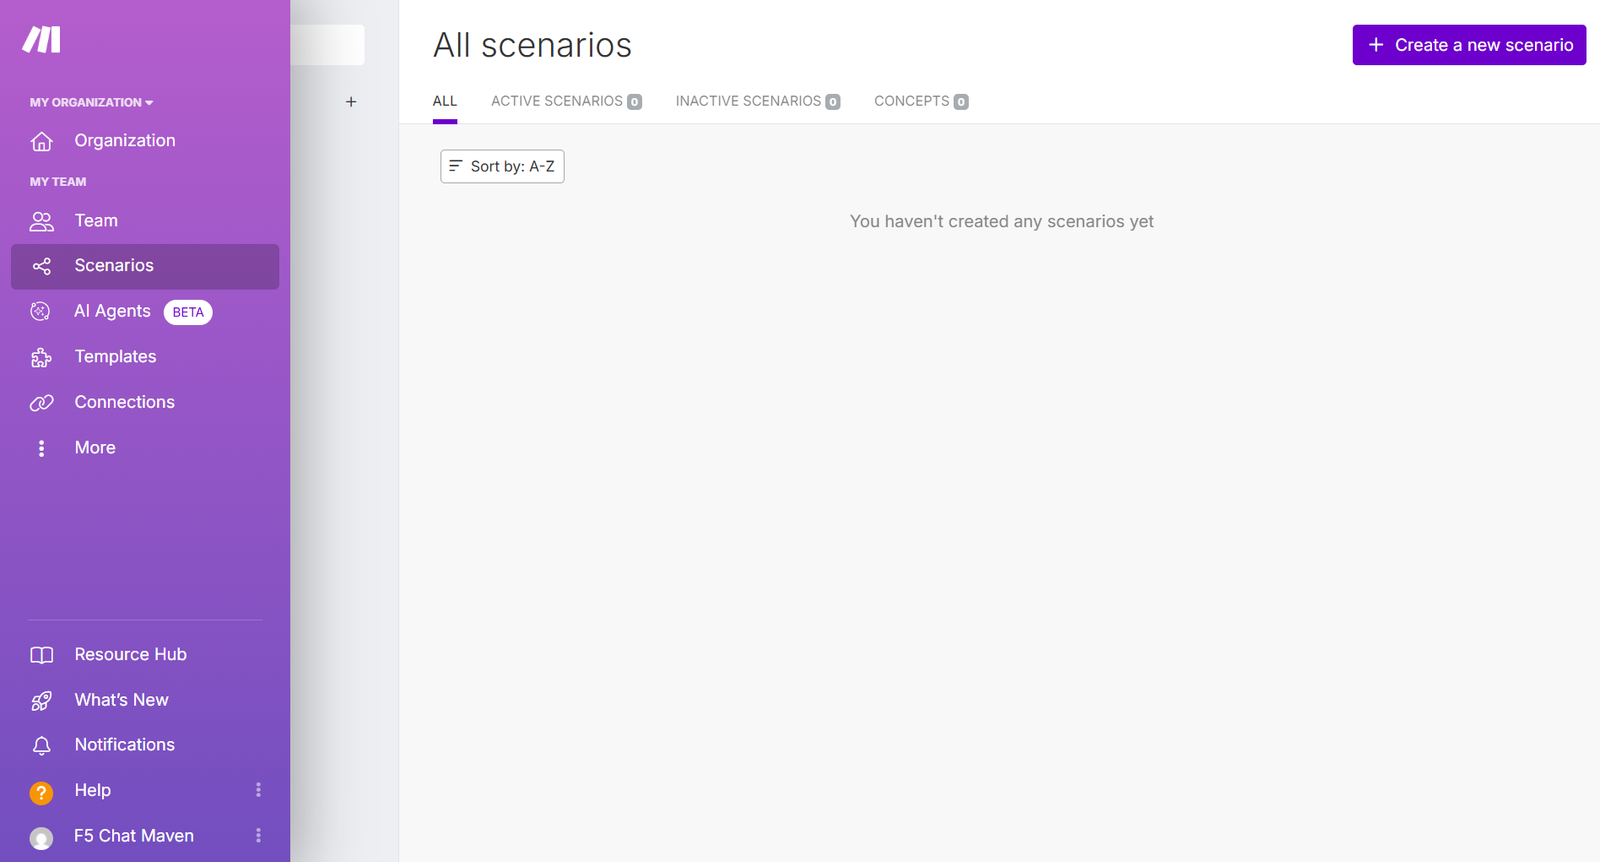
Step 7: Go to Scenarios in Make.com.
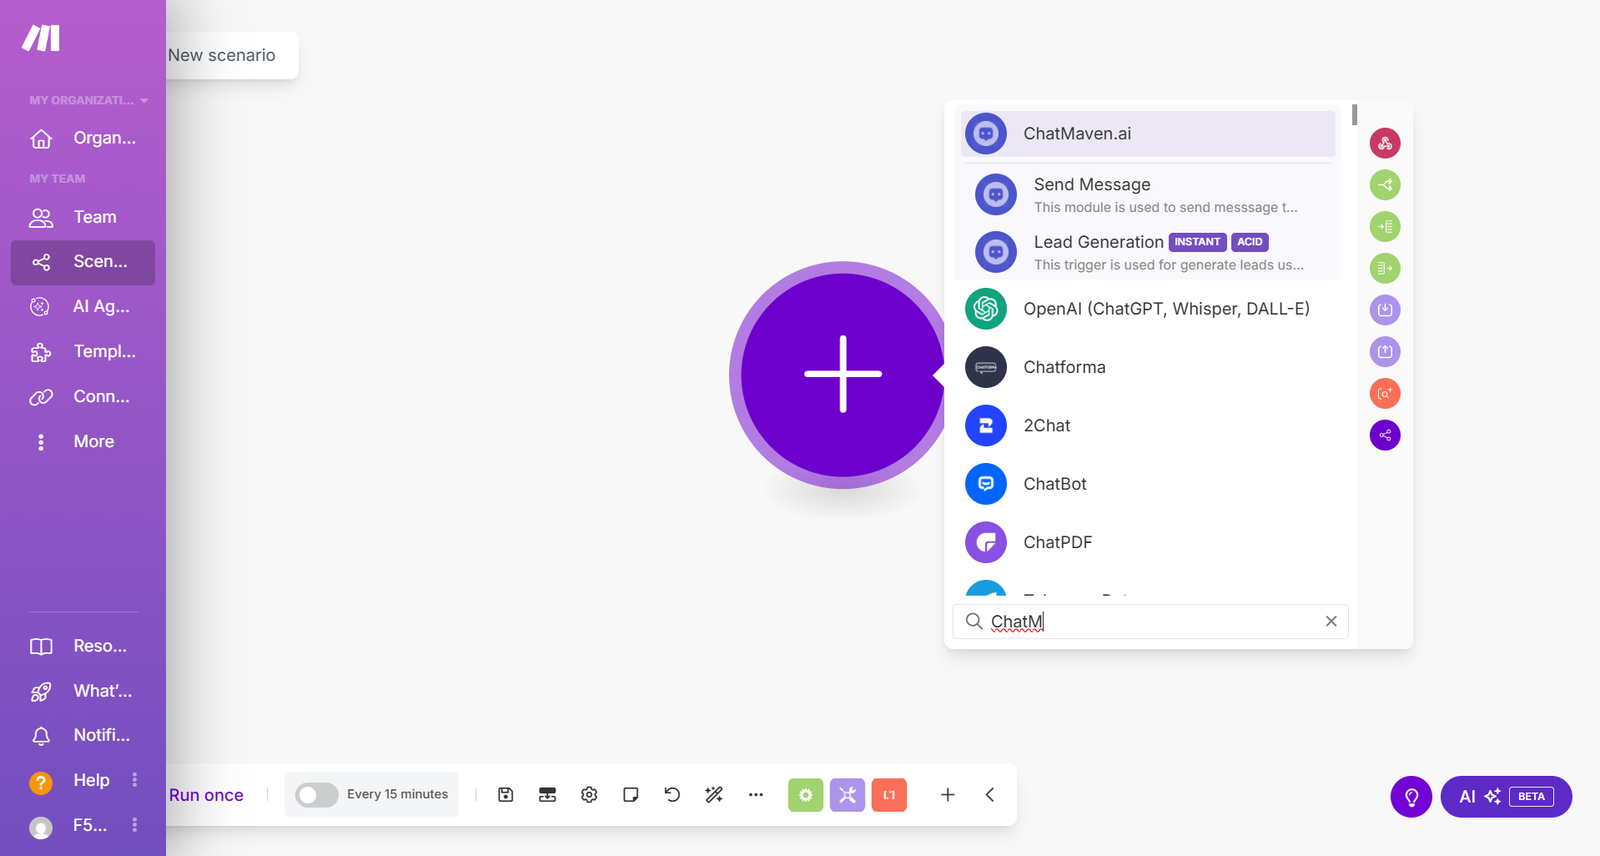
Step 8: Click Create a new scenario.
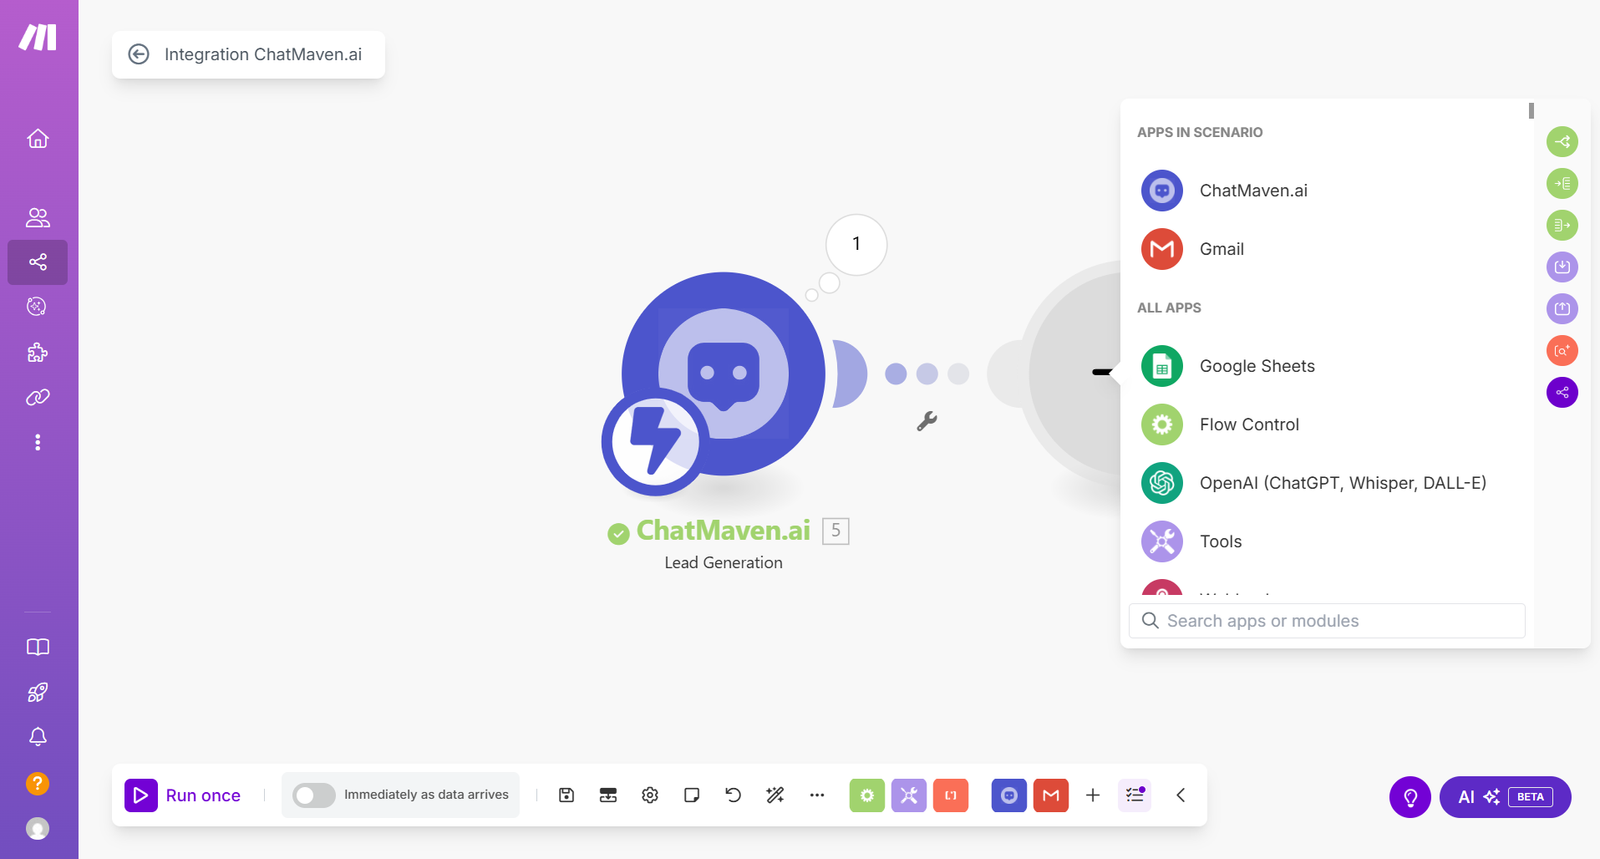
Step 9: In the search bar, type ChatMaven and select the app.
Step 10: Choose the trigger Lead generated.
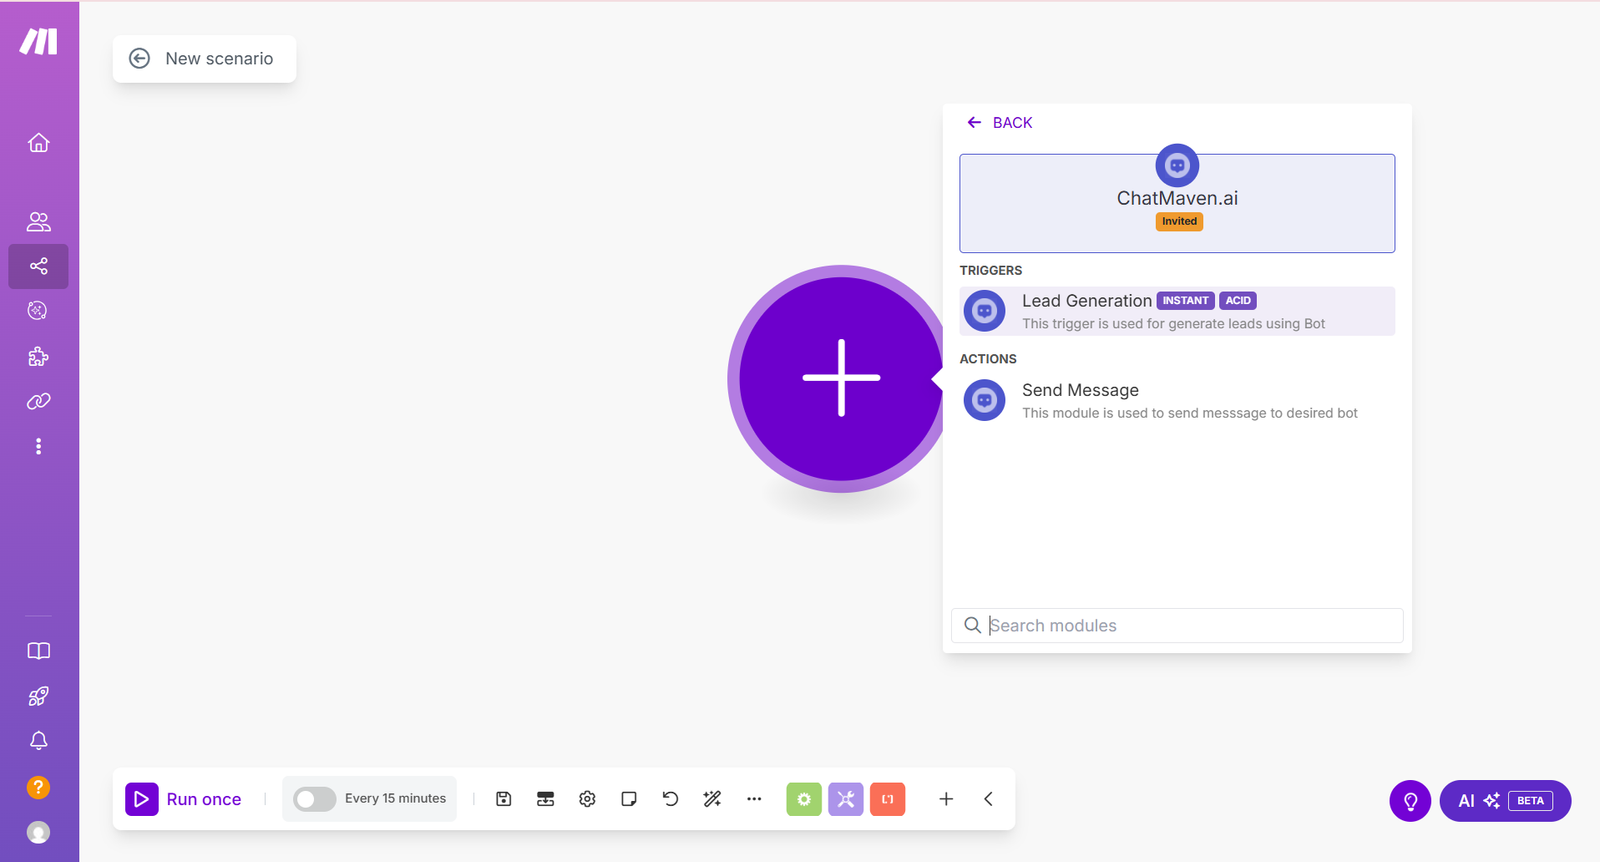
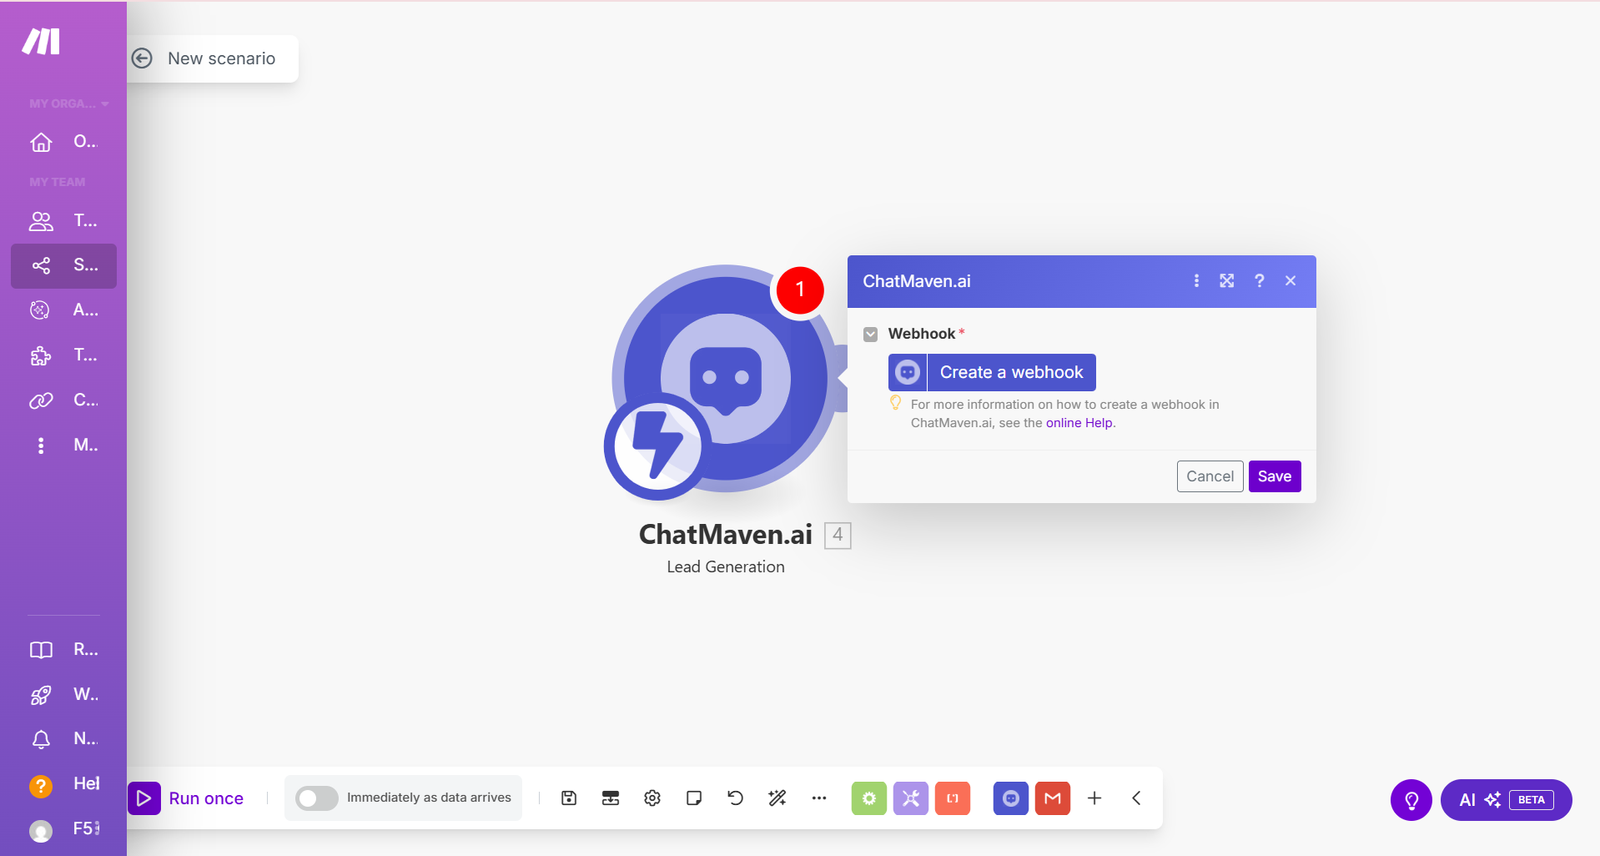
Step 11: Click the ChatMaven module, then click Create a webhook.
Step 12: Click Create a connection.
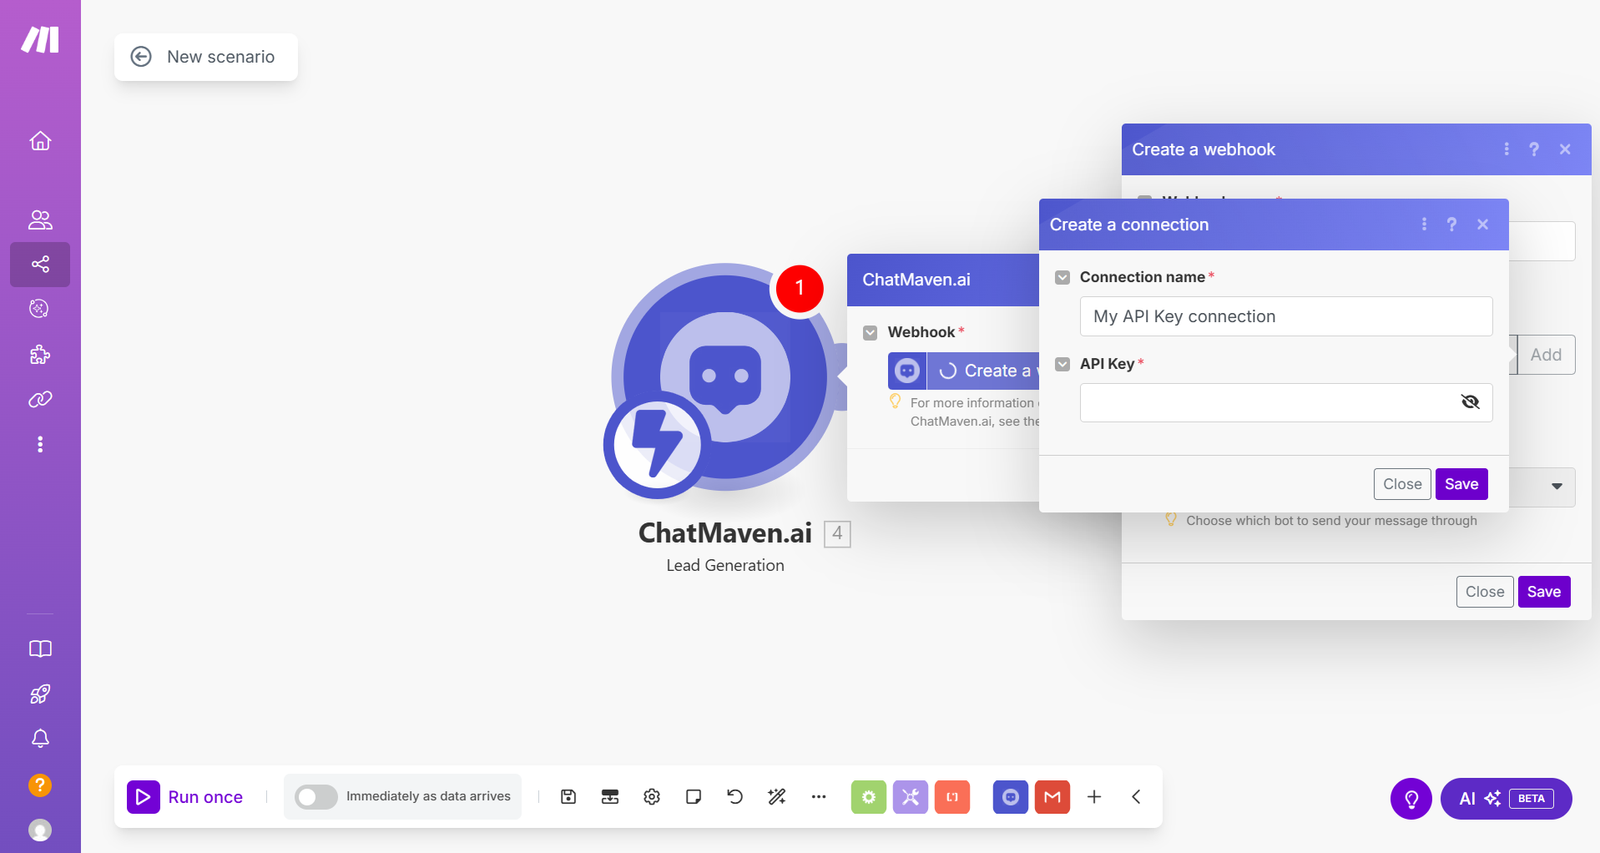
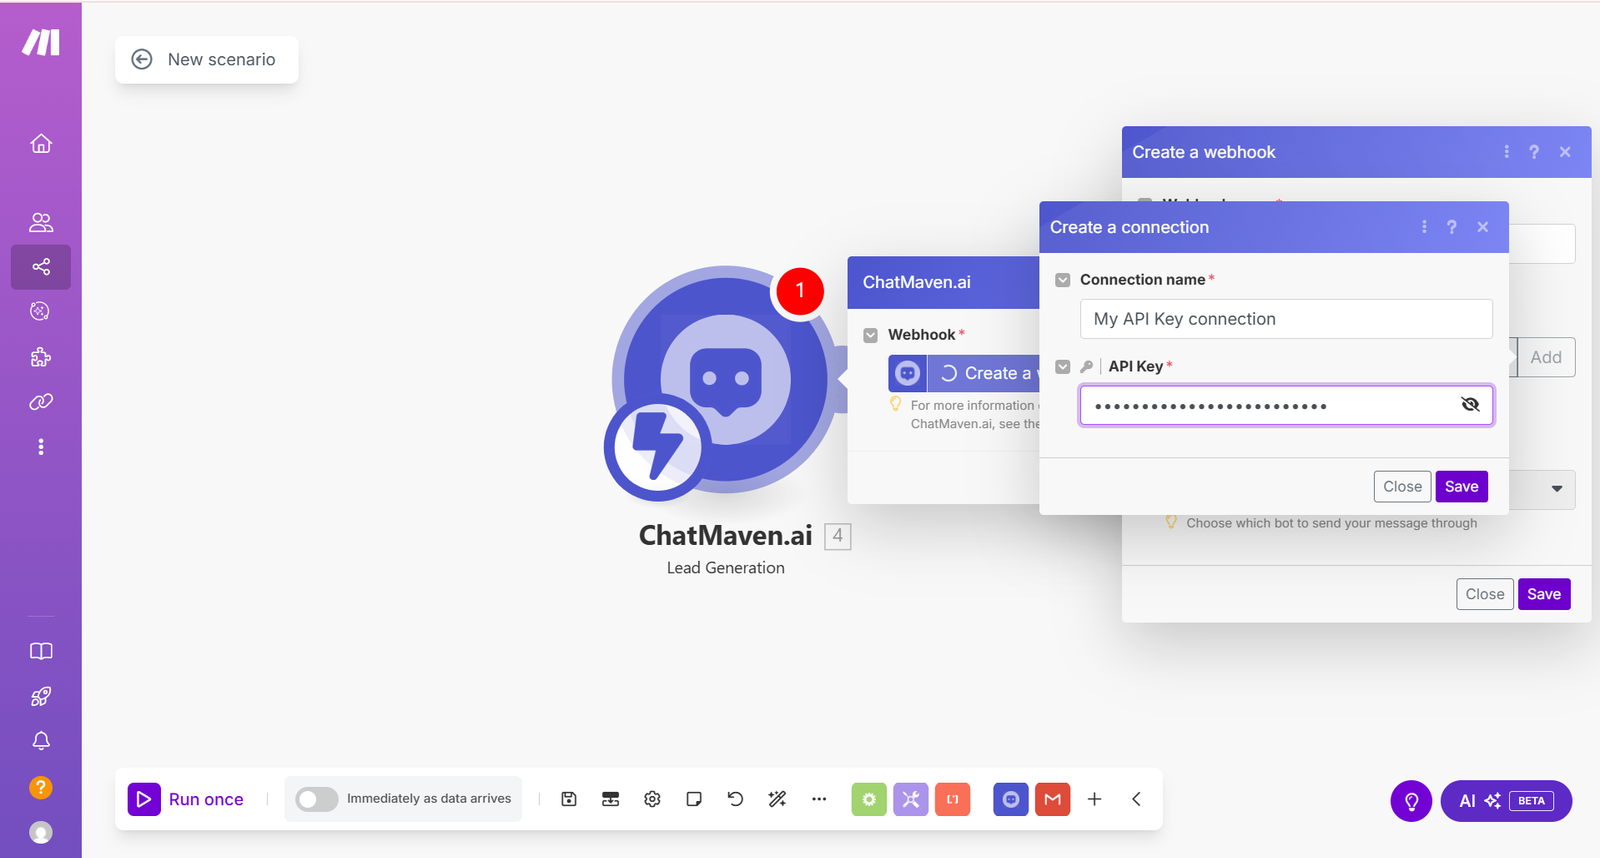
Step 13: Go to your ChatMaven Account section, copy the API key, and paste it in the popup.
Step 14: Click Save.
Step 15: Select the Bot ID from the dropdown list.

Step 16: Click Save, then OK.
Send Data to Google Sheets (Example)
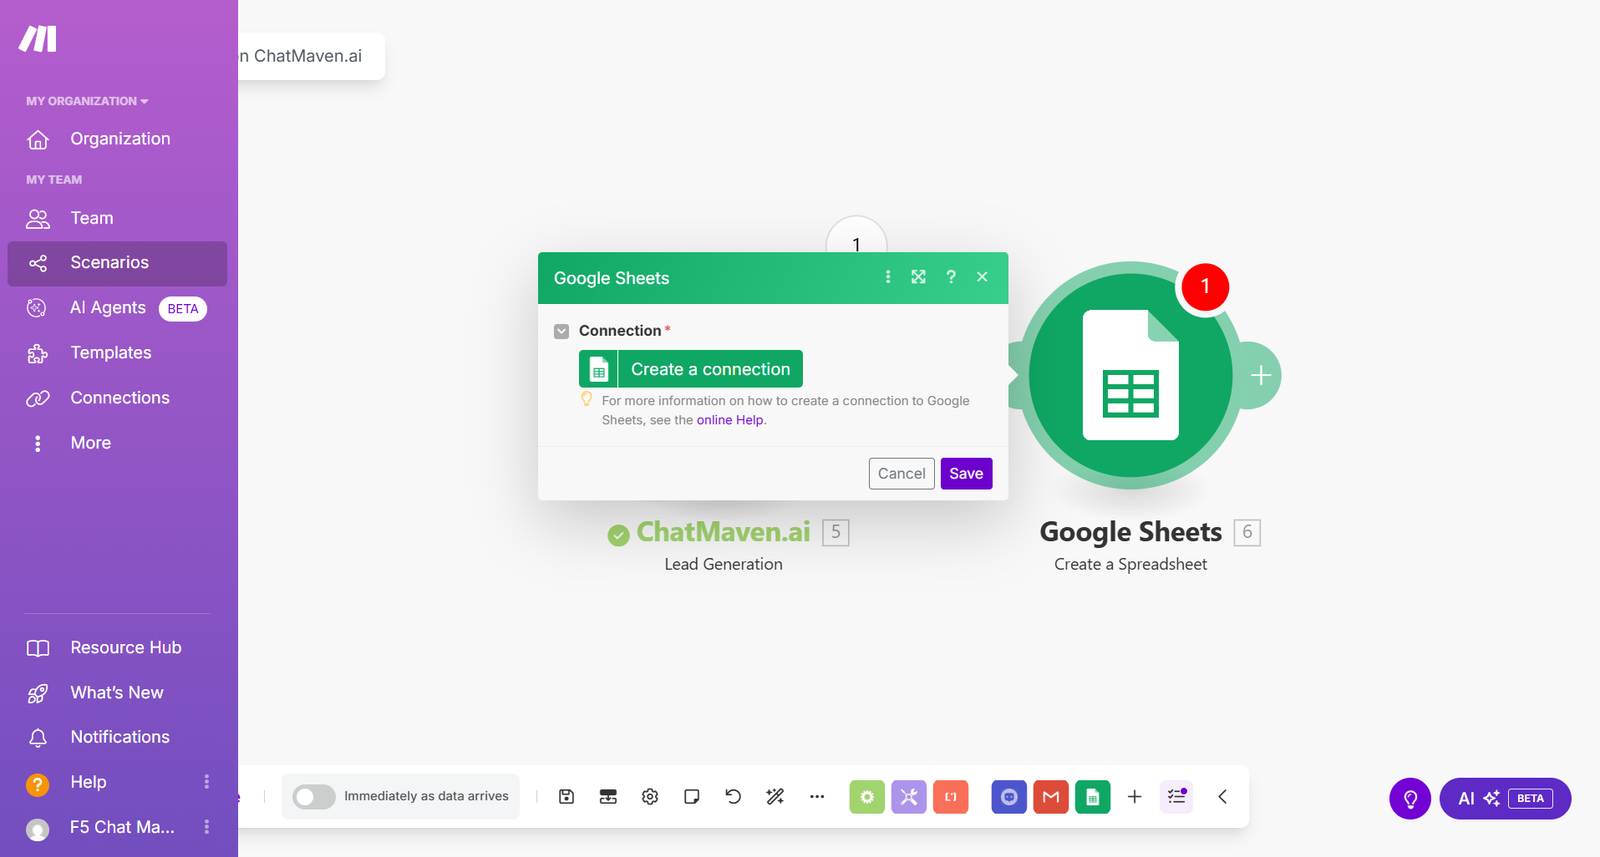
Step 17: Add another module and search for the app you want to send lead data to — e.g., Google Sheets.
Step 18: Select Create a Connection.
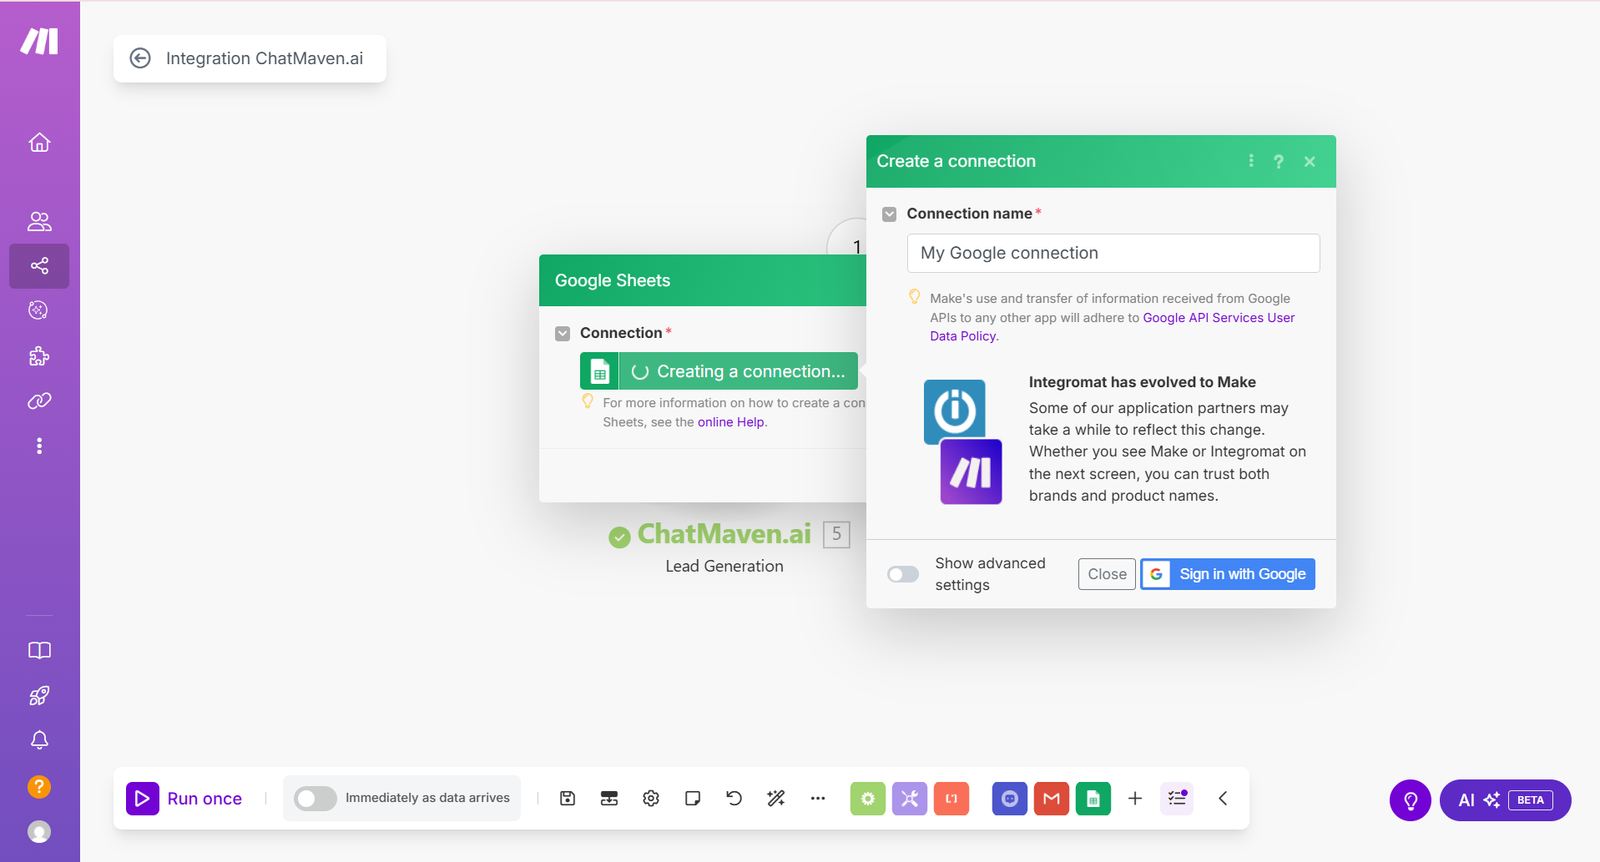
Step 19: If your Google account isn't connected yet, click Sign in with Google. If it is already connected, skip this step.
Step 20: Once connected, enter the sheet title and choose the columns where the data should go.
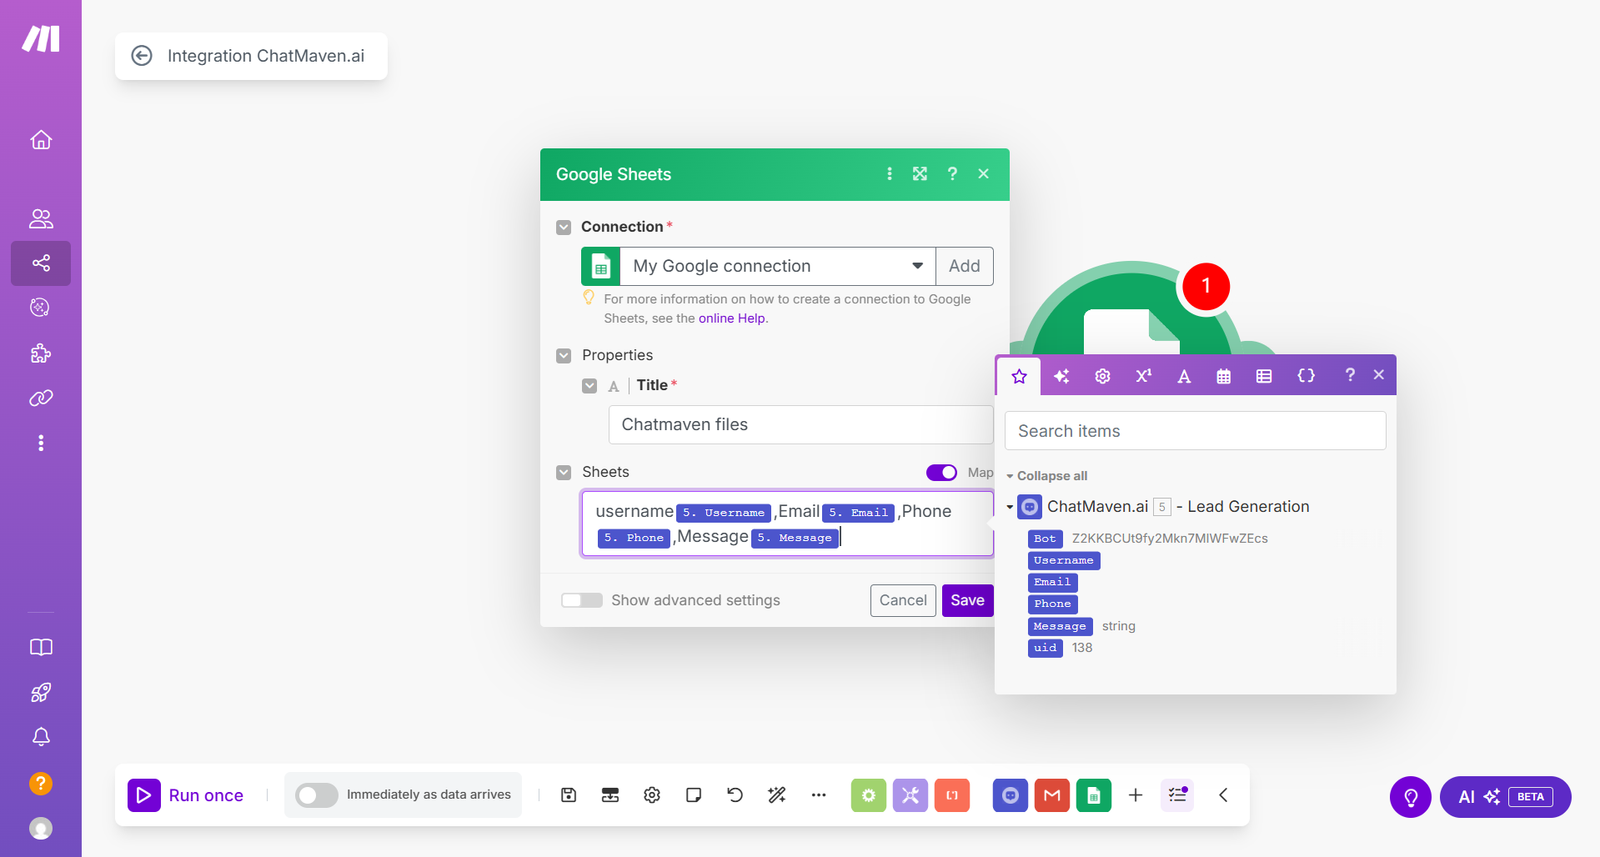
Step 21: Click OK to save everything.

Next Steps
Now that you've set up the integration, you can:
- Test your automation
- Add more actions to your workflow
- Configure error handling
- Set up notifications
For more advanced configurations, check out our:
Troubleshooting
If you encounter any issues:
- Verify your API key is correct
- Check that your Bot ID is properly selected
- Ensure your Google Sheets permissions are properly set
- Review Make.com scenario logs for error messages
Need Help?
If you need assistance with your Make.com integration:
- Contact ChatMaven Support
- Visit our Community Forum
- Check Make.com's Documentation